What Is a Metallic Epoxy Garage Floor Kit?
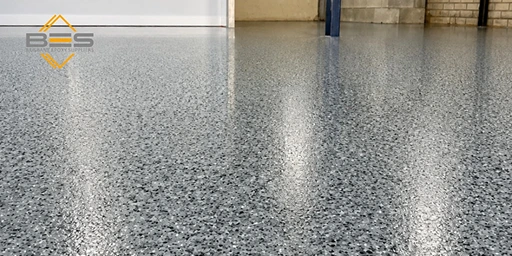
A metallic epoxy garage floor kit is a complete set of materials and tools designed to transform your garage — or just about any space — into a sleek, durable, and visually striking surface. Thanks to its unique 3D effect and high-gloss finish, this type of flooring has become increasingly popular among Brisbane homeowners, Queensland contractors, and DIY enthusiasts alike.
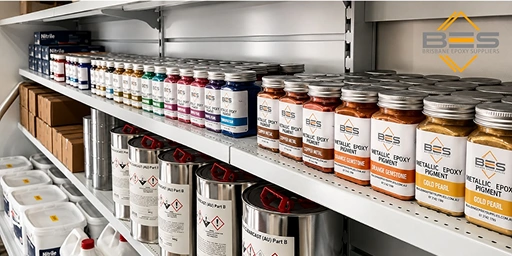
The kit typically includes everything you need: an epoxy primer, clear epoxy resin and hardener, metallic pigments, a protective topcoat, and all the necessary application tools. In this article, we’ll walk you through what’s inside a metallic epoxy garage floor kit and how to install it correctly. All kits featured here are available from Brisbane Epoxy Suppliers, with delivery across Brisbane and Queensland. If you’re curious about how this system works and whether it’s the right fit for your space, stick with us—we’re diving into all the details.

What’s Included in a Typical Metallic Epoxy Kit?
A typical metallic epoxy flooring kit usually includes the following:
- Epoxy Primer (Base Layer): This is the first layer applied directly onto the concrete surface. Its job is to prepare the concrete so it can bond better with the epoxy. A good primer makes a huge difference—it helps the next layers stick properly and last longer.
- Clear Epoxy Resin & Hardener: These two are the heart of the system. The epoxy resin on its own is sticky and liquid, but once it’s mixed with the hardener, a chemical reaction kicks in. That’s what transforms it into a solid, durable surface that can take a lot of wear and tear.
- Metallic Pigments: Here’s where the magic happens. These are special metallic powders added to the clear resin. When spread across the floor, they create one-of-a-kind effects — marble swirls, ocean waves, or a deep galaxy-like finish. The colour options are virtually endless, whether you’re going for a bold statement or a subtle natural vibe. Brisbane Epoxy Suppliers stocks a wide range of metallic epoxy systems suitable for both DIY and professional applications across Queensland.
- Topcoat (Protective Layer): After the metallic epoxy layer has cured, a clear topcoat is applied to seal everything in. This layer protects the surface from scratches, stains, chemicals, and even UV rays. Some topcoats also have anti-slip properties, which is super helpful for garages or any space where safety matters.
- Application Tools (Optional): Some kits also include the tools you need to get the job done—like rollers, trowels, spike shoes (so you can walk on the wet epoxy without damaging it), and mixers for blending materials properly.
For an even more dramatic finish, some people like to sprinkle in metallic flakes for epoxy, giving the floor extra depth, texture, and sparkle. It’s a simple touch that can make the whole space feel next-level.
Benefits of a Metallic Epoxy Floor in Your Garage
Let’s take a closer look at some of the top reasons why metallic epoxy flooring is such a smart and stylish choice for your garage.
1. A Stunning, One-of-a-Kind Look
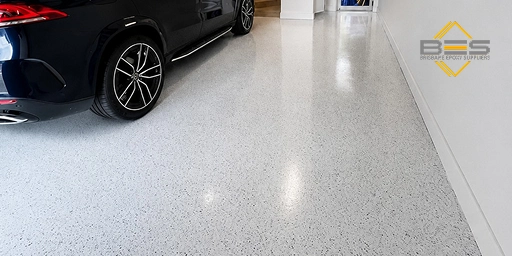
Metallic epoxy flooring is more than just a surface coating for your garage—it’s a piece of art. Unlike traditional floor finishes that look flat and uniform, metallic pigments are suspended in the epoxy resin, creating mesmerizing 3D effects that can resemble marble, flowing water, or even outer space.
No two floors ever look exactly the same, which gives your garage a sense of luxury and individuality. It turns what used to be a purely functional area into a design-forward extension of your home or business.
2. Exceptional Durability and Resistance
One of the biggest advantages of metallic epoxy floors is their incredible toughness. Garages go through a lot, oil leaks, gasoline spills, chemical exposure, heavy vehicles, and constant foot traffic.
These floors are built to handle it all without cracking, peeling, or fading. The high resistance to impact, abrasion, and harsh substances means your garage floor will last for years with minimal upkeep.
3. Easy to Clean and Maintain
One of the reasons people fall in love with metallic epoxy is how low-maintenance it is. The surface is smooth, seamless, and non-porous, making it super easy to keep clean. Unlike bare concrete, which traps dust and stains, this floor repels dirt and liquids.
A quick sweep or a damp mop is usually all it takes. Even oil and chemical spills can be wiped away without leaving a trace. That glossy (or even matte finish epoxy floor, if that’s more your style) look stays fresh and sharp with very little effort.
4. Moisture and Stain Resistance
Because metallic epoxy forms a completely waterproof seal, it protects the concrete underneath from water damage. This is especially useful in garages where melted snow, rain, or other moisture can easily make their way in.
Its stain-resistant nature means it can handle grease, oil, paint, and all kinds of chemicals without losing its shine, or its epoxy floor texture.
5. Boosts Property Value
Installing a high-quality metallic epoxy floor isn’t just about aesthetics — it’s a smart long-term investment. In Brisbane’s competitive property market, a polished, modern garage floor adds genuine kerb appeal and real resale value. Whether you’re preparing to sell your Queensland home or simply want to elevate your everyday space, a metallic epoxy kit delivers both visual impact and lasting practicality. If you’re ready to get started, browse our metallic epoxy kits or contact our team for a free product recommendation.

Step-by-Step Installation Guide for Metallic Epoxy Kits
If you’re looking for a way to upgrade the durability and look of your garage, installing a metallic epoxy kit might just be the perfect solution. But how exactly do you go about it? Here’s a step-by-step guide to installing your metallic epoxy floor the right way:

1. Surface Prep: The Secret to Long-Lasting Results
If there’s one step you don’t want to rush, it’s this one. Proper surface preparation is the single most important factor in a successful and long-lasting metallic epoxy garage floor — whether you’re doing a DIY project in Brisbane or a large commercial install across Queensland. The floor must be completely clean and free from dust, oil, grease, paint, or any contaminants before you begin. For the right preparation tools and accessories, check our epoxy accessories range. Any oil stains should be scrubbed away with a concrete-specific degreaser.
Next, fill in any cracks, holes, or uneven areas using a quality concrete patch or repair compound. Once the surface is level, it needs to be roughened slightly using either mechanical grinding or acid etching. This gives the epoxy something to bond to. And most importantly, make sure the floor is bone dry before moving forward.
Yes, this part takes time, but it’s what makes the difference between a floor that lasts for years and one that peels in a few months.
2. Apply the Epoxy Primer
Once the surface is fully prepped and dry, it’s time for the primer. This is the base coat that helps the epoxy adhere tightly to the concrete. Most kits come with a two-part primer that needs to be mixed in precise ratios, follow the instructions closely!
Using a roller or flat trowel, apply a thin, even layer of primer across the entire floor. Give it time to dry (usually several hours) before moving to the next step. Be sure to check the drying time listed in your kit.
3. Mix and Pour the Metallic Epoxy Layer
Now comes the fun part, the magic moment when your floor starts to look like a piece of art. Combine your clear epoxy resin, hardener, and the metallic pigment powder exactly as directed in your kit. Use a mechanical mixer to blend everything thoroughly, no clumps, no streaks!
Once mixed, you’ll need to move quickly. Pour the metallic epoxy onto the floor and spread it out with a notched trowel or roller designed for epoxy application.
This is where you can get creative. Use different roller movements, blending techniques, or even spritz some isopropyl alcohol for marbling effects. The result? A high-gloss, 3D finish that’s absolutely one-of-a-kind. Let the surface cure as recommended, don’t rush it.
Pro tip: The same technique can also be adapted for other spaces, just like using clear epoxy for shower floor installs where you want durability without sacrificing aesthetics.
4. Seal It with a Protective Topcoat
After the metallic layer has fully cured (usually 24 to 48 hours), it’s time to lock everything in with a topcoat. This final layer is what protects your floor from scratches, UV rays, chemical spills, and stains.
Like the primer, this topcoat is typically a two-component system. Mix it carefully and apply it evenly across the entire surface.
Not only does this layer strengthen your floor, but it also enhances its shine, or you can go for a satin or matte look, depending on your style. Give it several days to fully cure before moving heavy equipment or vehicles back in.
Installing a metallic epoxy cement floor might sound like a big project, but with the right kit, the right prep, and a little patience, the results are seriously worth it. You’re not just upgrading your garage, you’re creating a space that’s built to last and designed to impress.
Metallic Epoxy Floor Maintenance Tips
Metallic epoxy floors are not only stunning, they’re also incredibly durable. But like anything beautiful and long-lasting, they need a bit of love and care. Luckily, keeping your garage’s epoxy resin floor in top shape is pretty straightforward. Just follow a few simple steps, and your floor will keep turning heads for years to come.
1. Gentle, Regular Cleaning
Sweep or vacuum the floor regularly to remove dust and grit that can cause tiny scratches over time. For deeper cleaning, use a damp mop with warm water and a mild detergent—something as simple as dish soap works great. Avoid abrasive cleaners, acidic solutions, or anything containing ammonia. These can dull or damage the epoxy surface.
2. Clean Spills Promptly
If you spill oil, coolant, or any chemical—don’t wait. Wipe it up immediately with a clean, absorbent cloth. This prevents staining and keeps the floor’s shine intact. Quick action really makes a difference.
3. Prevent Physical Damage
Place protective pads under heavy shelving units, toolboxes, or machinery legs. If you’re moving something heavy, use wheeled dollies or slide it over plywood to distribute the weight.
Even though high solids epoxy is built to handle a lot, taking small precautions helps maintain that flawless finish.
4. Avoid Harsh Tools and Chemicals
Never use wire brushes, abrasive pads, or aggressive chemicals on your epoxy floor. These can leave scratches or make the surface look cloudy. Stick to neutral pH cleaners and soft cleaning tools—your floor will thank you for it.
5. Inspect and Repair When Needed
Check the surface every so often for chips, cracks, or signs of wear. Addressing minor damage early prevents bigger issues down the line. You can find small repair kits specifically designed for epoxy floors—they’re easy to use and super effective.
Whether you’re a homeowner in Brisbane’s southside, a tradie working across Southeast Queensland, or a commercial contractor tackling a large showroom floor, Brisbane Epoxy Suppliers has the metallic epoxy kits and accessories to get the job done right. We stock professional-grade epoxy systems and application tools with delivery available across Brisbane and Queensland. Not sure which kit suits your project? Contact us for a free recommendation.
Conclusion
We hope this guide has helped you get a better understanding of what a metallic epoxy garage floor kit is and how it can transform your space. If you’re considering installing one, make sure to purchase your kit from a trusted, professional supplier. And for the best results, it’s always a good idea to work with experienced contractors who specialize in epoxy flooring. With the right team and quality materials, you can achieve a stunning, durable, and professional-looking floor that truly elevates your garage